Showing posts with label Mother's Day Bouquet. Show all posts

Sunday, November 4, 2012

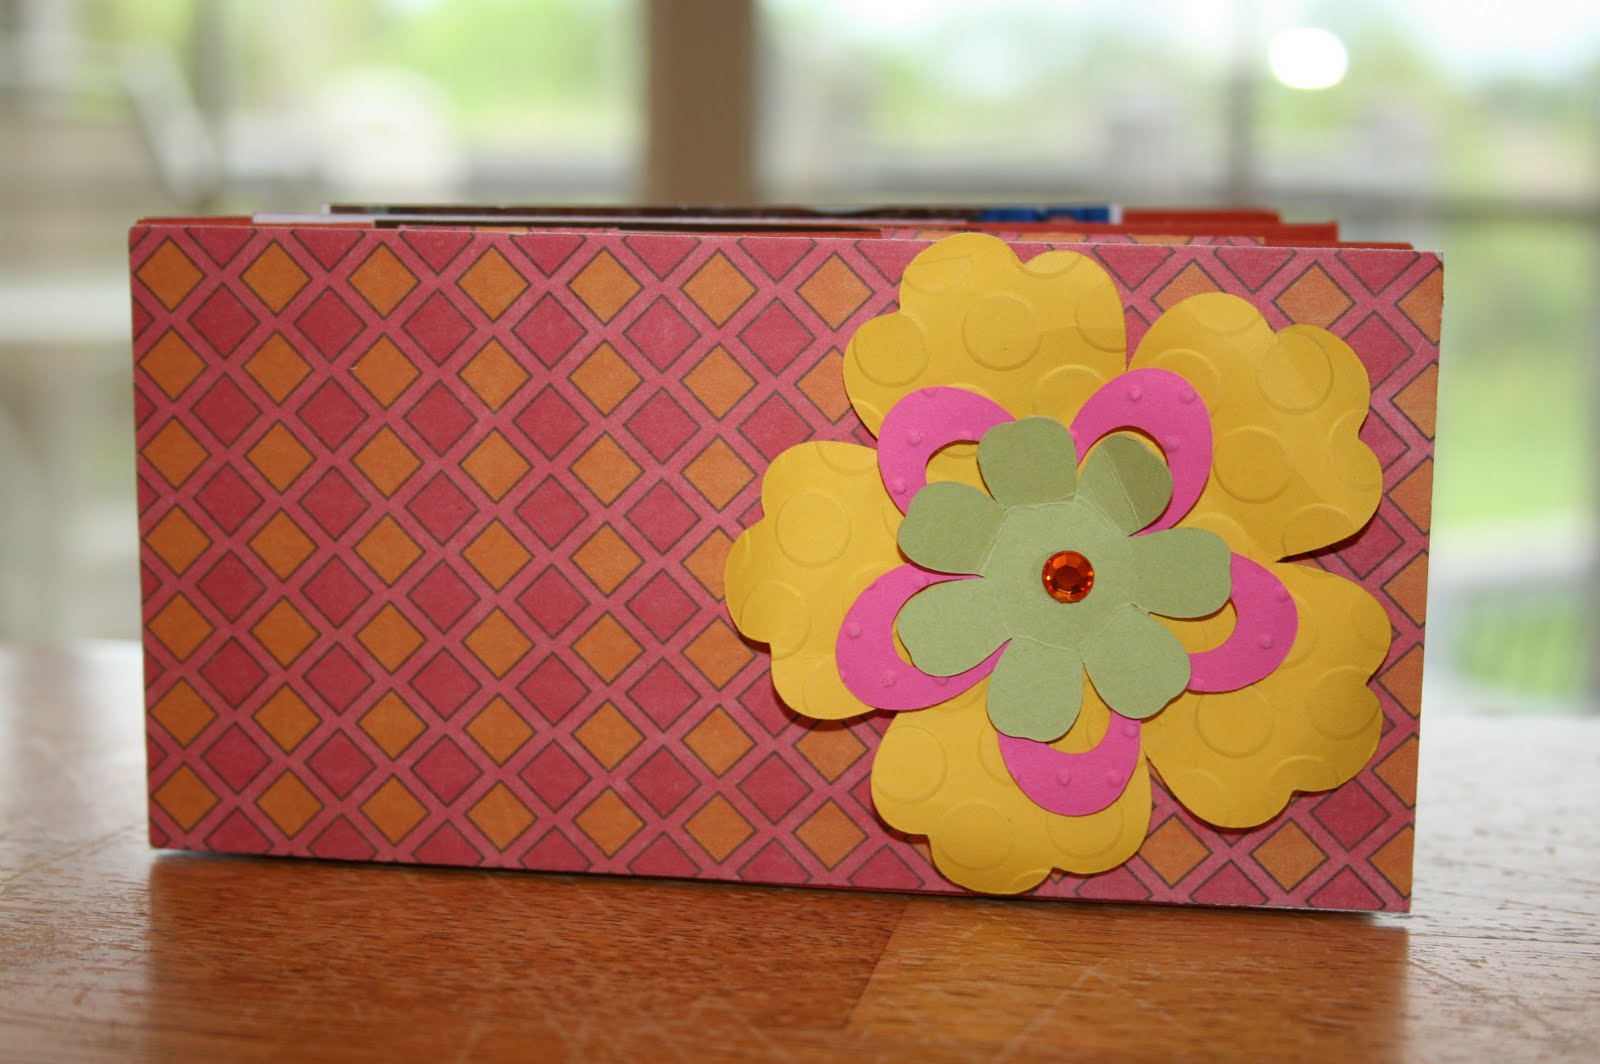
Snip and Folder Mini Album : #1

I found this post from LAST YEAR. For some reason it never posted. Weird. So here it is. I made this last May. Hahaha.

I love this simple and easy mini album. This was the first attempt for me at a mini album. I was inspired by a tutorial from Laura Denison at Following the Papertrail. She has the most creative paper crafting ideas and projects. She really puts a lot of detail into her mini albums! I needed a mini quick to put some pics of my kiddos in.

I used a 12x12 piece of cardstock and scored at 6 inches. Then I turned the paper and scored again every 3 inches. I cut along every other score line and "flipped and folded" as shown in Laura's tutorial.

I added some chipboard for the front and back cover measuring 3"x6". Then I covered it with patterned paper. I cut out some flowers from the Mother's Day Bouquet Cricut Cartridge at varying sizes. I Cuttlebuged some of the flowers for texture. Then I rolled the petal edges to give depth. And of course added some rhinestone bling for the center.


To bind the folded pages I punched out several 3" flowers, folded them, and adhered them to each side of the pages. The insides of the pages are just pictures and journaling - pretty plain.

To see the full tutorial by Laura Denison and her "Flip and Fold Mini Album" just click here and find her on youtube!

Monday, October 22, 2012

"This and That" Anniversary Box

Happy Monday everyone. Today is my turn to post on the Pumpkin Spice Blog.

This weekend my family and I celebrated my grandparents 65th wedding anniversary. My grandparents are just the cutest couple. They laugh together, and travel, and just love each other so much. What an amazing example they have set for our family. As a gift, everyone in the family participated in a "mail call", writing letters and cards for them. I created this box to hold all the letters in.

I bought a plain black scrapbook box from my local hobby store. I painted the top with white acrylic paint. When that was dry, I applied a thin layer of Modge Podge and laid down some paper. After layering more paper and the title, I applied a final layer of Modge Podge to seal everything in. The flowers and embellishments on top were glued on with hot glue.


Supplies:

 Echo Park "This & That - Graceful" -  Red Floral

 Echo Park "This & That - Graceful" - Teal Damask

 Echo Park "This & That - Graceful" - Lace

 Echo Park "This & That - Graceful" - Brown / Light Pink
Echo Park "This & That Graceful"
found here for $0.55

 Echo Park "This & That - Graceful" - Alpha Stickers
Echo Park "This & That" Alpha stickers
found here for $2.09

 Echo Park "A Boy's Life" - Play Time
Echo Park "A Boy's Life"
found here for $0.55

 Beautiful Moments Double-Sided Cardstock Pad 6"X6"
Carta Bella "Beautiful Moments" 6x6 paper pad
found here for $4.20

 CITRON - “Grow” Brads
MME "Indie Chic" brads
found here for $4.19

 GINGER - “Pictures” Decorative Tape
MME "Indie Chic" washi tape
found here for $6.99

 Londonerry Avon Rose Mulberry Paper Flowers 1" 24/Pkg
Prima Flowers
found here for $3.50

Cricut Cartridges : Lacy Labels, A Child's Year, Mother's Day Bouquet, Flower Shoppe

Hope you have a wonderful week!! This may be the last days of semi warm weather for us in the midwest.


Saturday, January 7, 2012

January Pumpkin Spice Blog Hop


Welcome hoppers. I'm the first stop for the Shop Pumpkin Spice Blog January blog hop! (Click here to start at the beginning of the hop so you can get all the info). We've started a new term and increased our Design Team members. I can't wait for you to meet them - they make beautiful things.

This month's blog hop theme is "Your Style". While hopping around you'll get to see the designers styles and tastes. It's a great way to see all the different varieties of paper crafting gals we've got.

I would say my style is a simple compilation of the 3 Cs: I have a classic style, I love being creative with my paper crafts, and I almost always use my Cricut!!

For this hop I created a "Stand Alone Photo Frame Book"! I was inspired by my new Cinch (thanks sis!) and the beautiful paper of Jillibean Soup. This book closes up with Velcro so it's easy to transport. Then it folds open to stand up on it's own. Each page is a photo frame with a seasonal theme. I was amazed that the combination of 3 of the Jillibean Soup 6x6 paper pads could create all four seasons. Check it out!

This is the front cover all folded up. The papers across are scraps from all the paper inside.

You open the Velcro flap...

...and flip the front cover around. The short flap becomes the base of the stand.

Ta da! The book stands on it's own.

Spring photo frame.

Summer photo frame.

Fall photo frame.

The frames fit a 4x6 photo. Here are my kiddos Trick or Treating.

Winter photo frame.
I was thinking of giving this as a gift but now that it's done, I need it for myself as a brag book. Hehe.

Supplies:
 Watermelon Gazpacho Paper Pad 6\"X6\" 24 Sheets
Jillibean Soup
Watermelon Gazpacho Soup 6x6 paper pad
found here for $4.19

 Apple Cheddar Soup Paper Pad 6\"X6\" 24 Sheets
Jillibean Soup
Apple Cheddar Soup 6x6 paper pad
found here for $4.19

 Christmas Eve Chowder Paper Pad 6\"X6\" 24 Sheets
Jillibean Soup
Christmas Eve Chowder 6x6 paper pad
found here for $4.19

 Echo Park - Holly Jolly Christmas - Alpha Sticker 12\"x12\" sheet
Echo Park
Holly Jolly Christmas
Alpha Stickers
found here for $2.09

 Echo Park - Holly Jolly Christmas Brad Assortment
Echo Park
Holly Jolly Christmas
Decorative Brads
found here for $4.19

 Say It In Crystals Adhesive Jewels 551469
Prima "Say it in Crystals"
adhesive jewels
found here for $2.10

My Mind's Eye "12 Days of Christmas" trims
Chalk Ink
Black cardstock
Cinch and 1" black binding
Cricut cartridges : Campin' Critters, Graphically Speaking, Mother's Day Bouquet, Life's a Beach
Chipboard (I use cereal boxes)

Your next stop is the very talented Lenae. Have fun at everyone's stop! Be sure to check out the card kit that Shop Pumpkin Spice is featuring this month. It has amazing products all packaged together for a great price. I know I'll be purchasing one for sure.

Here's the hop lineup in case you get lost!

We love reading all your comments. Be sure to welcome all the new designers - we are so happy to have them!

Thursday, October 13, 2011

Baby Banners

My friend came over for some much needed crafting time a couple week ago. She was throwing a baby shower for her friend who was in the hospital on bed rest with TWIN GIRLS. Needless to say my friend wanted to make name banners for the mommy-to-be to spruce up the rather dull hospital room.


We used the Mother's Day Bouquet Cricut cartridge for the circle and the flower shapes. The circles were cut at 8" and the flowers were cut at 6.5". The letters are from the Birthday Bash Cricut cartridge and cut out at 6". I love how bold and simple the letters turned out. The mommy is a no frills kinda gal so we kept the banners really simple.


Then we made this diaper cake with Newborn size diapers. Isn't it so cute! My friend had the best idea - inside the cake, helping to keep it's shape and keep it strong, are two Diaper Genie refills. We wrapped them in white tissue paper so you can't see them. My friend bought the flower and pinwheel decorations that we stuck on the sides. We made the letter "B" using the Birthday Bash Cricut cartridge and glued it to a bamboo skewer. Couple rhinestones later and we were done.

My friend said the mommy-to-be was super thrilled with her decorations. We hope she puts the banners over the cribs so the new babies don't get mixed up!


Tuesday, July 19, 2011

Fairy and Butterfly Wind Chime

My craft room is decked out with fairy statues and fairytale items I've been collecting since my childhood. It's my happy space and these things make me happy! It reminds me of my youth and of whimsy and delight. Keeps me creating whimsical and delightful creations!

I came up with this wind chime idea while napping on the couch with my daughter. She was very into Disney TV and I was spacing out. (One can only see those shows so many times before the brain melt starts!)

I started with a cut from the new Flower Shoppe Cricut cartridge. I cut "Fun4" at fit to page. I taped the flower together to give it it's 3D shape. Then I cut an image from the Paper Lace cart both in chipboard and white cardstock. I hot glued my new Paper Lace "bracket" inside the flower.


This is what the top of my wind chime looks like upside down.

I cut two different fairies from A Child's Year cart and butterflies from Paper Lace in varying sizes. I attached them to 24 inches of green and turquoise ribbon with glue and hot glue. At the bottom of the ribbons I attached varying sizes of flowers from the Mother's Day Bouquet cart. In between the flowers I hot glued a penny for weight. Lastly, I attached rhinestones along the ribbon for some sparkle.


For the top of the wind chime I glued a variety of Mother's Day Bouquet flowers in varying sizes and colors.


I took these pictures outside on my deck. My neighbors beautiful garden is the perfect backdrop for these photos.


Recipe
Cricut Cartridges : A Child's Year, Flower Shoppe, Paper Lace, Mother's Day Bouquet
Paper : Basic Grey "Urban Prairie" and My Mind's Eye "Where the Heart Is"
Ribbon : $1 bin at Michael's
Rhinestones : The Paper Studio Gemstones from Hobby Lobby


I am entering this project at My Pink Stamper for her design team. The challenge was to make anything Cricut with the colors orange, turquoise, green and brown.

I had a lot of fun making this fairy and butterfly wind chime. This morning my son said "I really like your hanger mom, can I have it." To impress a 4 year old boy is compliments enough.